
Tepte.com


Your VivoMini’s optical drive may support several disc formats such as CDs, DVDs, recordable discs, or rewritable
discs.
Your VivoMini’s optical drive may support several disc formats such as CDs, DVDs, Blu-ray discs, recordable discs,
or rewritable discs.
NOTE: Ensure to use a Blu-ray compatible media player when playing the contents of a Blu-ray disc.
This indicator lights up when your VivoMini is accessing the internal storage drive.
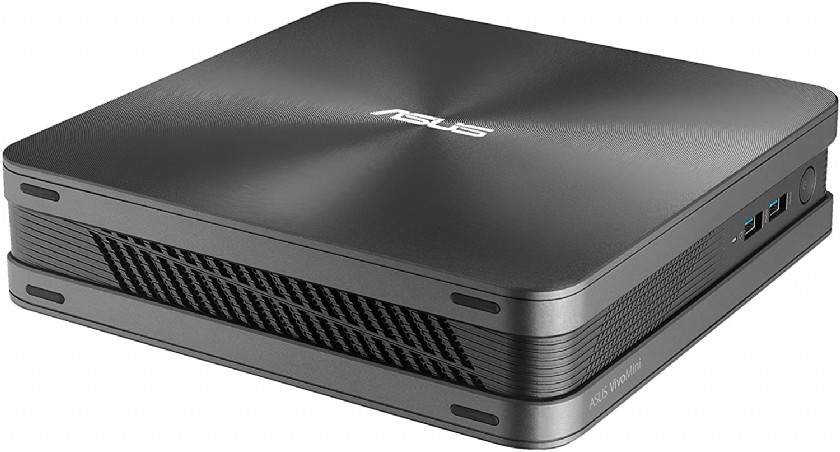
VivoMini MiniBarabone PC The USB 3.1 Gen 1 (Universal Serial Bus) port provides a transfer rate up to 5 Gbit/s.
NOTE: This port may vary per model.
VivoMini MiniBarabone PC The USB 3.1 Gen 2 (Universal Serial Bus) port provides a transfer rate up to 10 Gbit/s. This port also supports the Battery Charging 1.2 technology that allows you to charge your USB devices.
VivoMini MiniBarabone PC The USB 3.1 Gen 1 (Universal Serial Bus) port provides a transfer rate up to 5 Gbit/s. This port also supports the Battery Charging 1.2 technology that allows you to charge your USB devices.
The power button allows you to turn the VivoMini on or off. You can also press the power button once to put your VivoMini to sleep mode.
The Kensington® security slot allows you to secure your VivoMini using Kensington® compatible VivoMini security products.
This port allows you to connect your VivoMini to an external display.
The 8-pin RJ-45 LAN port supports a standard Ethernet cable for connection to a local network.
The 9-pin serial (COM) connector allows you to connect devices that have serial ports such as mouse, modem, or printers.
Insert the power cord into this port to supply power to your VivoMini
The USB 3.1 Gen 1 (Universal Serial Bus) port provides a transfer rate up to 5 Gbit/s.
The USB (Universal Serial Bus) port is compatible with USB 2.0 or USB 1.1 devices such as keyboards, pointing devices, flash disk drives, external HDDs, speakers, cameras and printers.
The air vents allow air to enter your VivoMini chassis.
IMPORTANT! For optimum air flow, ensure that the air vents are free from obstructions.
The HDMI (High Definition Multimedia Interface) port supports a Full-HD device such as an LCD TV or monitor to allow viewing on a larger external display.
The USB 3.1 Gen 1 (Universal Serial Bus) port provides a transfer rate up to 5 Gbit/s.
The USB 3.1 Gen 2 (Universal Serial Bus) port provides a transfer rate up to 10 Gbit/s.
NOTE: This port may vary per model.
This USB Type-C™ (Universal Serial Bus) Type-C™ port provides a transfer rate of up to 5 Gbit/s.
This USB Type-C™ (Universal Serial Bus) Type-C™ port provides a transfer rate of up to 10 Gbit/s.
This port allows you to connect your VivoMini to an external display.
The microphone jack is designed to connect to a microphone used for video conferencing, voice narrations, or simple audio recordings.
This port allows you to connect amplified speakers or headphones.
BIOS (Basic Input and Output System) stores system hardware settings that are needed for system startup in the VivoMini.
In normal circumstances, the default BIOS settings apply to most conditions to ensure optimal performance. Do not change the default BIOS settings except in the following circumstances:
WARNING! Inappropriate BIOS settings may result to instability or boot failure. We strongly recommend that you change the BIOS settings only with the help of a trained service personnel.
To load the default values for each of the parameters in your BIOS:
NOTE: POST (Power-On Self Test) is a series of software controlled diagnostic tests that run when you turn on your VivoMini.
IMPORTANT!
NOTE: The illustrations in this section are for reference only. The slots may vary depending on model.
Replace the top cover (A) your VivoMini and slide it towards the front of the VivoMini to re-attach (B), then push the latch up and secure it using a screw (C and D).
NOTE: Ensure to remove the holder from the bracket when installing an HDD/SDD to the HDD1R bracket. The availability of the holder may vary depending on the model type, country, or region
NOTE: Ensure to organize the cables to prevent any damage to your VivoMini and to ensure the top cover can be replaced successfully.
Your VivoMini comes with two SO-DIMM memory slots that allow you to install two DDR4 SO-DIMMs.
NOTE: If you want to remove the SO-DIMM slot cover, use a flathead screwdriver.
DRIVERS AND TOOLS
VivoMini VC65R.ASUSrecommends Windows 10 Pro. The actual transfer speed of USB 3.0, 3.1, 3.2, and/or Type-C will vary depending on many factors including the processing speed of the hostdevice, file attributes and other factors related to system configuration and your operating environment.
https://www.asus.com/us/Mini-PCs/VivoMini-VC65R/HelpDesk_Download/
 47 times.
tepte.com: Your Questions and Answers Resource with a Wealth of General Knowledge
Are you seeking a one-stop destination for comprehensive knowledge and answers to your burning questions? Look no further than tepte.com! Our platform is your go-to source for a wide range of information, all conveniently presented in an easily accessible question and answer format.
At tepte.com, we pride ourselves on being your reliable knowledge hub. Whether you're curious about technology, science, history, or any other subject under the sun, our extensive General Knowledge (GK) knowledge base has you covered. We've made it our mission to provide you with in-depth insights and facts on an array of topics. Read more
