
Tepte.com


A juicer, also known as a juice extractor, is a tool used to extract juice from fruits, herbs, leafy greens and other types of vegetables in a process called juicing. It crushes, grinds, and/or squeezes the juice out of the pulp.
Some types of juicers can also function as a food processor. Most of the twin gear and horizontal masticating juicers have attachments for crushing herbs and spices, extruding pasta, noodles or bread sticks, making baby food and nut butter, grinding coffee, making nut milk, etc.
Reamers
A manual-styled squeezer is used to separate citrus' juice from its pulp.
Squeezers are used for squeezing juice from citrus such as grapefruits, lemons, limes, and oranges. Juice is extracted by pressing or grinding a halved citrus along a juicer's ridged conical center and discarding the rind. Some reamers are stationary and require a user to press and turn the fruit, while others are electrical, automatically turning the ridged center when fruit is pressed upon.
Centrifugal juicers
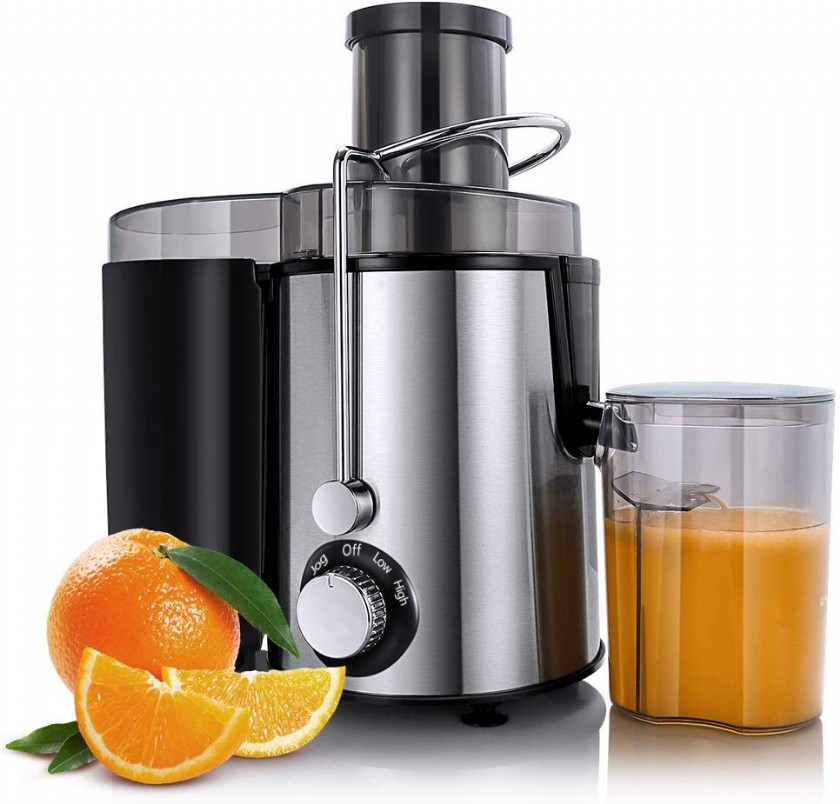
A centrifugal juicer cuts up the fruit or vegetable with a flat cutting blade. It then spins the produce at a high speed to separate the juice from the pulp.
Masticating juicers
A masticating juicer known as cold press juicer or slow juicer uses a single auger to compact and crush produce into smaller sections before squeezing out its juice along a static screen while the pulp is expelled through a separate outlet.
Triturating juicers
Triturating juicers (twin gear juicers) have twin augers to crush and press produce.
Juicing press
A juicing press, such as a fruit press or wine press, is a larger scale press that is used in agricultural production. These presses can be stationary or mobile. A mobile press has the advantage that it can be moved from one orchard to another. The process is primarily used for apples and involves a stack of apple mash, wrapped in fine mesh cloth, which is then pressed under approx 40 tonnes. These machines are popular in Europe and have now been introduced to North America.
Steam juice extractor
A stovetop steam juice extractor is typically a pot to generate steam that is used to heat a batch of berries (or other fruit) in a perforated pot stacked on top of a juice collecting container that is above the steam pot. The juice is extracted without mechanical means so it is remarkably clear and because of the steam heating it is also pasteurized for long term storage.
SPEED SELECTOR GUIDE
Apples - High
Apricots (pit removed) - Low
Beets (trimmed) - High
Blueberries - Low
Broccoli - Low
Cabbage - Low
Carrots - High
Cauliflower - Low
Celery - High
Cucumber (peeled, optional) - Low
Cucumber, soft skinned - High
Fennel - High
Grapes (seedless) - Low
Kiwi Fruit (peeled) - Low
Kale - High
Mangoes (peeled, pit removed) - Low
Melons (peeled) - Low
Nectarines (pit removed) - Low
Oranges (peeled) - Low or High
Peaches (pit removed) - Low
Pears (stem removed) - Low or High
Pineapple (peeled, optional) - High
Plums (pit removed) - Low
Raspberries - Low
Tomatoes - Low
Watermelon (peeled) - Low
Care & Cleaning
Ensure the juicer is turned off by turning the juicer dial to the OFF position. Then unplug the power cord.
CLEANING
Rinse all parts after use (except the motor base) under running water to clear away the majority of juice and pulp. Wash in warm soapy water with a soft cloth. To avoid food drying on to the blades, mesh or transparent parts, rinse and wash as soon as possible after use.
PULP CONTAINER
To minimize cleaning, you can line the pulp container with a biodegradable bag to collect the pulp.
MOTOR BASE
To clean the motor base, wipe with a soft, damp cloth then dry thoroughly. Wipe any excess food particles from the power cord. Do not immerse the motor base in liquids.
CLEANING AGENTS
Do not use abrasive scouring pads or cleaners on either the motor base or the jug, as they may scratch the surface. Use only warm soapy water with a soft cloth.
DISHWASHER
Wash all parts (except the motor base) in warm soapy water with a soft cloth. The filter bowl surround, stainless steel filter basket, food pusher and pulp container are dishwasher safe. Wash on a standard cycle, on the top shelf only. The juice cover and juice jug are not dishwasher safe.
FILTER BASKET
To ensure consistent juicing results, always clean the filter basket thoroughly immediately after use.
If pulp is left to dry, it may clog the fine pores of the filter mesh, which can effect juicing performance. The filter basket can be soaked in hot soapy water for 10 minutes, if necessary.
Hold the filter basket under running water and use brush (supplied with the juicer) in a circular motion to clear away pulp from the inside of the basket, including the blades. Turn over to brush away pulp from the outside of the basket, and repeat if necessary.
After cleaning, hold up towards a light source to check that the fine mesh pores are not blocked. If blocked, soak the filter basket in hot water with 10% lemon juice to loosen, and brush under running water again.
Do not soak the filter basket in bleach, harsh chemicals or abrasive cleansers.
Always treat the filter basket with care, as it can be easily damaged. Do not use if there is any damage or deformation to the filter mesh. Filter basket can be washed in the dishwasher (top shelf).
The center of the filter basket has an array of small, sharp blades. Do not touch these blades when handling the filter basket.
STUBBORN FOOD STAINS
Discoloration of the plastic may occur with strongly colored fruit and vegetables. To help prevent this, wash parts immediately after use.
If discoloration does occur, the plastic parts can be soaked in water with 10% lemon juice or can be cleaned with a non-abrasive cleaner.
• The safety locking arm may not be correctly engaged in the vertical operating position. Check the top cover is properly aligned and the locking arm is located firmly into the two grooves on either side of the juicer cover.
• Motor overload protection may have operated (see below).
• The juicer is equipped with an internal self-resetting overload to prevent the motor from damage under heavy or continuous loads. If the motor suddenly stops working, turn the dial to OFF, and unplug the unit from the power outlet. Allow the juicer to cool for up to 30 minutes before operating again.
NOTE: The unit MUST be unplugged from the power outlet in order for it to cool and be reset.
• Despite this overload protector, we suggest juicing in smaller batches, without excessive pushing force, to avoid overheating and stalling and to maintain the life of the motor.
• Stop juicing, disassemble to scoop excess pulp off the juicer cover. Reassemble and continue juicing. Alternating soft and hard ingredients may help avoid this.
The cleaner the filter, the better the juice yield, and dryer the pulp. Be sure to thoroughly clean the juicer as soon as possible after each use. Remove the stainless steel filter basket and thoroughly clean mesh walls with a cleaning brush. Rinse the filter basket under hot water. If the fine mesh holes are blocked, soak the basket in a solution of hot water with 10% lemon juice to unlock the holes or wash in the dishwasher (top shelf). This will remove excess fiber build up (from fruit and vegetables) which could be inhibiting the flow.
Try a slower juicing speed and push the food pusher down the feed chute more slowly.
The juice is being extracted too fast: try a slower juicing speed (if possible) and push the food pusher down the feed chute more slowly.
• Wet pulp can build up under the juicer cover and stall the juicer if the juicer is used excessively without cleaning. If this occurs, disassemble and follow the cleaning instructions to clean the filter bowl surround, the stainless steel filter basket and the juicer cover. The juicer can also stall if excessive force is used to push produce down the feed chute. If this occurs, ensure that a more gentle pressure is used to push produce down the chute.
• The juicer will automatically stop operating if either too much food is being processed at one time or the pieces are not small enough. Try trimming the food or cutting into smaller pieces of even size and processing a smaller amount per batch. To continue juicing, reset the juicer by turning the juicer OFF and back ON.
• Allow the motor to reach full speed before putting ingredients in the chute. Pressing ingredients down before the juicer reaches full speed can cause the motor to stall or overload. Use gentle to moderate pressure on the pusher. Lower pressure produces a better juice yield.
• Hard fruit and vegetables will put excess strain onto the motor if a low speed is selected. Refer to the juicing guide to determine the correct speed for the fruit and vegetables selected for juicing.
This indicates the motor speed is slowed down to a not-efficient level. This may be caused by too heavy pushing force on the pusher or too much pulps sticking onto the lid or in pulp pin. Using proper pushing force on the food pusher or regularly clean the lid and pulp bin can prevent this situation to happen.
This indicates motor overload protection is activated. To reset the unit, unplug the unit from power and let the motor cool down for 10 to 15 minutes, and plug the power on again.
Published: Friday, May 1, 2020 Viewed 46 times.
In more extreme cases, the juicing chamber can crack, or even the motor can become overloaded and burn out. Again the solution is simple: clean the juicer thoroughly after every use. Be especially sure to clean the juicing screen of all juice or pulp particles with the cleaning brush.
Broccoli
Avocado
Whole Apples
Coconut
Kale
Pears
Pineapple
Whole Citrus Segments
Rhubarb
Bananas
Ice
How To Make Fruit Juice Without a Fruit Juicer : 4 Easy Steps
1. Before you start making fruit or vegetable juice, you must wash the food properly.
2. Using cheese slicer, you have to cut your fruit or vegetable in small pieces to ensure better juicing.
3. You have to mess your fruit or vegetable using a strainer in a bowl.
4. Transfer your juice in a jug or jar and mix it carefully.
tepte.com: Your Questions and Answers Resource with a Wealth of General Knowledge
Are you seeking a one-stop destination for comprehensive knowledge and answers to your burning questions? Look no further than tepte.com! Our platform is your go-to source for a wide range of information, all conveniently presented in an easily accessible question and answer format.
At tepte.com, we pride ourselves on being your reliable knowledge hub. Whether you're curious about technology, science, history, or any other subject under the sun, our extensive General Knowledge (GK) knowledge base has you covered. We've made it our mission to provide you with in-depth insights and facts on an array of topics. Read more
