


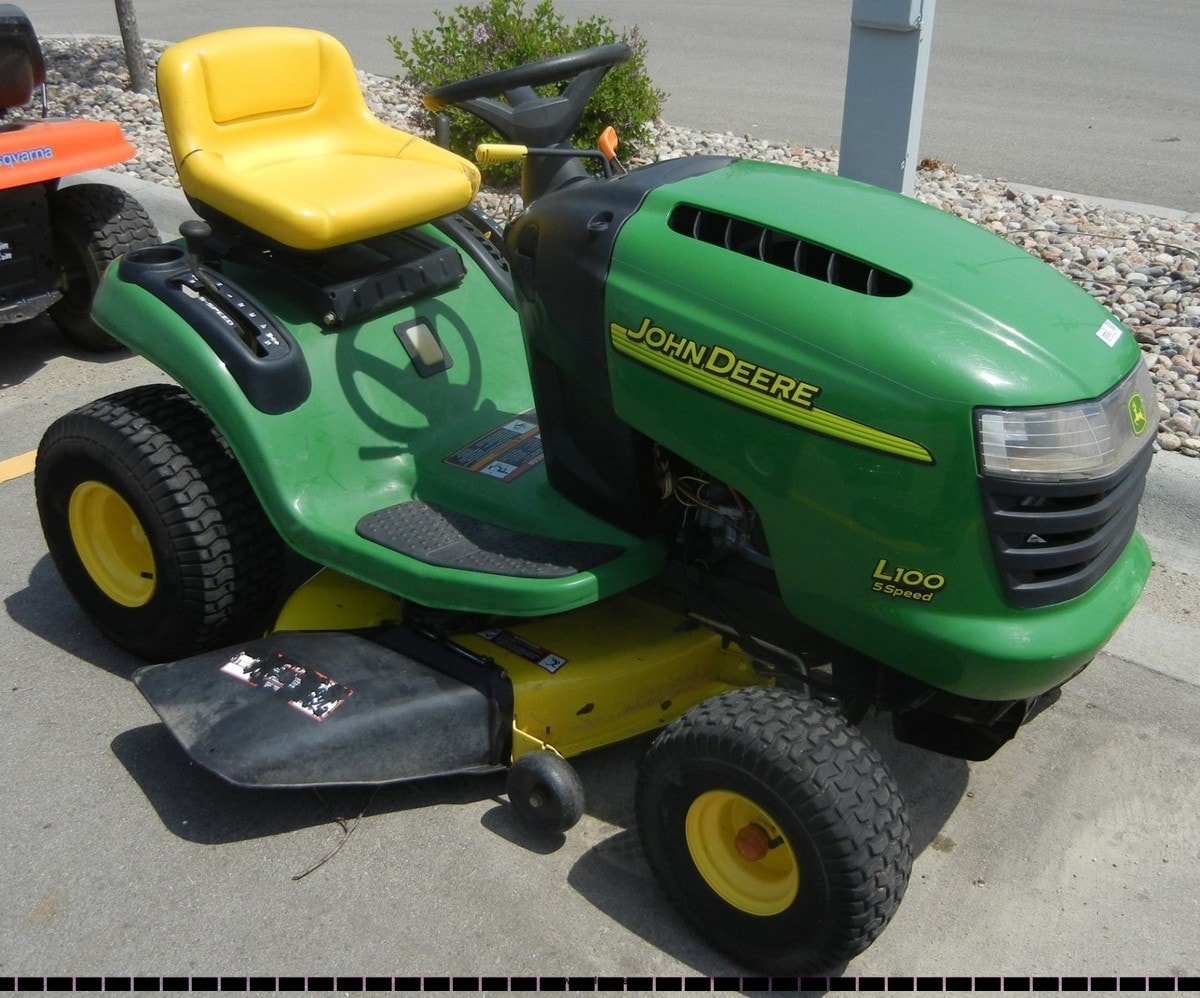
How to Adjust a John Deere Drive Belt?
How to adjust tension on belt of John Deere Ride On L100 When I am mowing it throws the belt and I cannot tighten the tension to put the belt back.
Subject: John Deere - Sub Subject: Adjust Drive BeltDate: 7/6/2019 Status: SOLVED
7 answered / 48 voted,
 1800 viewed.
 technician - Saturday, July 6, 2019 895
Determining Whether Adjustment Is Required
The transmission drive belt may or may not need an adjustment. Press down on the John Deere lawn and garden tractor's accelerator pedal with your hand just until the pedal starts to stiffen, becoming harder to press. Measure the distance from the bottom of the accelerator pedal to the accelerator pedal floorboard hole's back edge closest to the operator's seat. If the measurement from the bottom of the accelerator pedal to the accelerator pedal floorboard hole edge is less than 1 1/2 inches, then no transmission drive belt adjustment is required. Adjust the riding lawnmower transmission drive belt idler arm if the distance from the bottom accelerator pedal to the accelerator floorboard hole edge is greater than 1 1/2 inches.
Checking Drive Belts
1. Lower mower deck to the lowest setting.
2. Check belts for wear and damage.
3. Clean drive belt area with water or air pressure.
If drive belt needs to be replaced,
Locating the Belt Adjustment Components
The mower deck must be removed to gain access to the transmission drive belt idler arm. After you remove the lawn and garden tractor's mower deck, locate the transmission idler arm under the left side of the lawnmower's frame, just in front of the left rear tire. The transmission drive belt idler arm has two bolts in it, but there are a total of three holes, one of which is an adjustment bolt hole that doesn't hold a bolt. The transmission drive belt idler arm adjustment bolt hole is at the front of the transmission drive belt idler arm, next to the front of the transmission drive belt idler arm bracket.
Adjusting the Belt
The procedure to adjust the transmission drive belt begins with unscrewing the transmission drive belt idler arm bolt that is the farthest from the transmission drive belt idler arm bracket, using a combination wrench for the task. Pull the bolt from the top of the transmission drive belt idler arm bracket. Loosen the center bolt on the transmission drive belt idler arm, but do not remove it. Holding the top of the center bolt-head with the combination wrench while loosening the retaining nut on the underside with a socket wrench is the next task. Push the idler arm forward to align the adjustment bolt holes. Slide the previously removed bolt through the idler arm adjustment bolt hole from the top side down, and thread the retaining nut onto the bolt by hand. Hold the top of the bolt head with a wrench while tightening the nut on the bottom with a socket wrench. Tightening the transmission drive belt idler arm center bolt locks in the new position.
Checking and Adjusting Drive Belt Guides (SX85)
1. STOP engine.
2. Park riding mower on a level surface.
3. DO NOT engage park brake.
A -Nut
B -Front Belt Guide
C -Jacksheave
D -Nut
E -Rear Belt Guide
F -Tab
G -Belt GuIde (Variator)
H -Variator Bracket
4. Using a hoist or safe lifting device, lift rear wheels off surface.
5. Loosen nut (A) under axle to adjust front belt guide (B).
6. Do not push on jacksheave (C) when moving guide to primary drive belt. Make sure there is 1.6-3.2 mm (1/16-1/8-in.) clearance between top of front guide and jacksheave.
7. Tighten retaining nut and check adjustment.
8. Loosen rear belt guide retaining nut (D).
9. Slide rear belt guide (E) rearward to end of slot.
10. Adjust rear belt guide to within 1.6-3.2 mm (1/16-1/8-in.) of the traction drive sheave (upper) portion of the jacksheave.
11. Tighten retaining nut and check adjustment.
12. Tab (F) of variator belt guide (G) should be contacting variator bracket (H). Guide should be parallel to side and top of belt, but not touching belt.
NOTE: Variator belt MUST BE tight when adjusting.
13. To attain proper adjustment, it may be necessary to bend guide.
14. To verify adjustments, operate riding mower after adjusting guides.
Testing the Belt
After you install the mower deck under the lawn and garden tractor's frame, start the tractor and drive it in a large, safe area to test the transmission drive belt adjustment. Push the accelerator pedal forward to engage the transmission forward; release the pedal to allow the tractor to come to a complete stop. The tractor must to come to a complete stop when you release the accelerator pedal. If it does not stop when you release the accelerator pedal, then pressing the brake pedal fully and turning the ignition switch to the "Off" position is necessary. Adjust the transmission drive belt idler arm back to the original position until the transmission drive belt wears and stretches further.
The best ReplyANSWERS Write an Answer
❝How to Adjust a John Deere Drive Belt?❞ answers. technician asked first. Total 7 replies.
 0
0 0
0Location: Brownsville, TX?
0 0 0 0 0 0🛪 Berkeley, CA?
0 0 0 0Similar Questions
How do I read the engine codes of my Ford cars?
How do I read the engine codes of my Ford cars? How do you read Ford engine codes? How would you peruse Ford motor codes?
Ford / Engine Code Answers: 7 791
How long is the electric car battery life? Is it worth replacing hybrid battery?
Is it worth replacing the batteries of hybrid vehicles with a limited lifespan? How long is the electric car battery life? Is it worth replacing hybrid battery?
Hybrid Car / Battery Answers: 4 374
How do you remove a battery from a Ford Ranger?
How do you remove a battery from a Ford Ranger; Open the hood and locate the battery. Unbolt the battery tie-down from the battery tray using a 3/8-inch ratchet and socket. Lift the replacement battery into the battery tray so that the terminals are oriented the same way as the original battery.
Ford / Ranger Answers: 7 397
What is the difference between 2019 and 2020 Ford Ranger?
What is the difference between 2019 and 2020 Ford Ranger; There's a new FX2 package available in rear-wheel-drive models for 2020, and it adds some off-road-oriented features. There's also a bit of feature shuffling between the three Ranger trims. Otherwise, this Ford is unchanged from the 2019 mode
Ford / Ranger Answers: 4 846
What year Ford Ranger doors are interchangeable?
What year Ford Ranger doors are interchangeable; 1998 to 2012 are considered the same generation however there were some styling changes along the way as well as emission standard changes so not all parts will interchange between years. Best to stick to your year truck plus or minus a year or so.
Ford / Ranger Answers: 8 552
How do I remove the antenna from my Ford Ranger?
How do I remove the antenna from my Ford Ranger; Grab an 8mm ratcheting wrench or small ratchet with an 8mm socket and remove the bolt and clip holding the antenna base on. You might be able to squeeze the metal retaining clip enough to pop the antenna base up and off the roof, but I couldn't get it
Ford / Ranger Answers: 8 788
How often do you change the oil in a 2019 Ford Ranger?
How often do you change the oil in a 2019 Ford Ranger; Your vehicle is equipped with the Intelligent Oil-Life Monitor system, which displays a message in the information display at the proper oil change interval. This interval may be up to one year or 10,000 mi (16,000 km).
Ford / Ranger Answers: 4 390
How many quarts of oil does a Ford Focus 2.0 liter engine require?
How many quarts of oil does a Ford Focus 2.0 liter engine require; Pour in about 4 quarts of the Duratec 20 2.0L engine's 4.5 US quart (or 4.3L) total capacity for an oil change with filter replacement. It is far better to have less than enough oil in an engine than too much.
Ford / Focus Answers: 6 502
How do you set a radio station in a Ford Focus?
How do you set a radio station in a Ford Focus; Choose your Source by pressing AM, FM or Sirius. Press Direct Tune. Enter the desired station or channel, and press Enter. Press a Preset Bank to add the station, and then press and hold one of the Memory Preset buttons to save it.
Ford / Focus Answers: 7 738
What does battery discharge mean on BMW? Do you have to register a BMW battery?
What does battery discharge mean on BMW? Do you have to register a BMW battery; Many BMW owners call us about getting a “battery discharged” message on their dash. This is to alert you that your battery is getting low and the vehicle needs time to charge it before you shut the engine down again. Dri
Automotive / BMW 3 Series Answers: 8 434
Similar Articles
Microsoft OLE DB Provider for ODBC Drivers
error '80004005'[MySQL][ODBC 8.0(w) Driver][mysqld-8.0.44]Can't find FULLTEXT index matching the column list
/soru.asp, line 513