
Tepte.com


Looking for about wall panel assembly instructions or learn about wall panel assembly instructions or discuss about wall panel assembly instructions or share about wall panel assembly instructions or ask about wall panel assembly instructions.
Wall panels are a convenient and stylish way to enhance the aesthetics of a space while providing functional advantages. Whether you are considering installing wall panels for a residential or commercial project, proper assembly is crucial to achieve a durable and visually appealing end result.
Before starting the assembly process, ensure that the surface where the wall panels will be installed is clean and free from dust, grease, or any other contaminants. This will ensure better adhesion and longevity of the installation. Repair any cracks or damages on the surface to create a smooth and even base.
Accurate measurements are vital for a seamless fit and professional finish. Measure the wall panels precisely to suit the dimensions of your wall or desired layout. Mark the measurements on the panels and double-check before making any cuts.
Using appropriate tools such as a saw or cutter, carefully cut the wall panels according to the marked measurements. Take caution and follow safety guidelines while handling and cutting the panels to avoid accidents and damage.
Apply a high-quality adhesive to the back of the wall panels evenly using a recommended adhesive applicator, ensuring proper coverage. Consult the manufacturer's instructions or adhesive product guidelines for the best results. Allow the adhesive to become tacky before proceeding to the next step.
Carefully position the first cut panel on the wall, aligned with the desired starting point. Press it firmly against the wall, ensuring it is level and properly aligned. Use a level or measuring tools to double-check the panel's positioning. Repeat this process for the remaining panels, slotting them tightly together to create a seamless look.
Once all the panels are installed, inspect the walls to ensure they are level and aligned correctly. Use a rubber mallet or a block of wood to gently tap and secure any loose panels. Clean up any excess adhesive or debris to achieve a neat and professional finish. Maintain proper ventilation in the area during the drying process according to the adhesive manufacturer's recommendations.
If desired, you can further enhance the appearance by applying caulk to any visible seams or gaps between the panels. This step adds an extra layer of waterproofing and gives a smooth, cohesive effect. Once the caulk has thoroughly dried, you can paint the wall panels in your preferred color or finish to suit your overall design scheme.
Following these assembly instructions diligently will ensure a successful wall panel installation. Remember to prioritize safety precautions and choose high-quality materials to achieve long-lasting and visually pleasing results. Enjoy your newly transformed space with beautiful and functional wall panels!
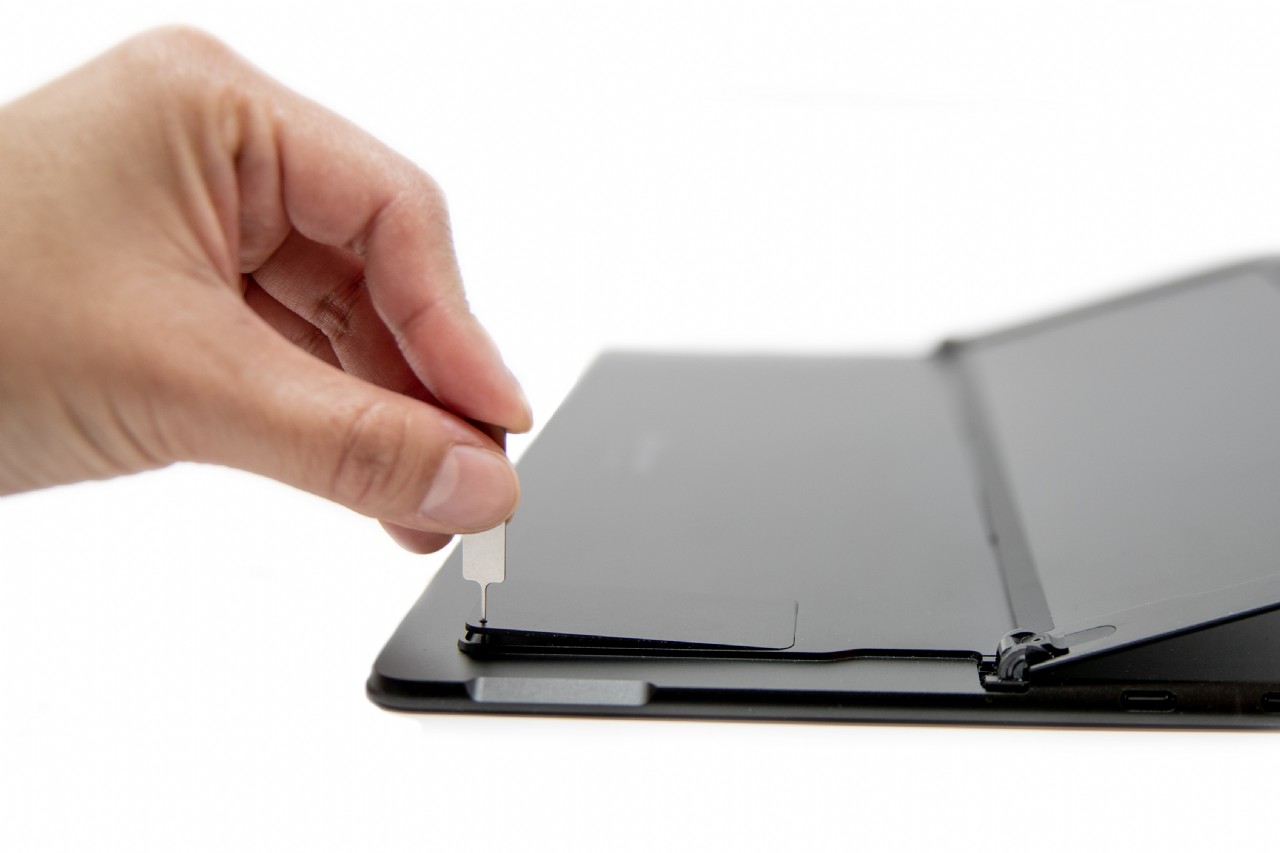
How to Insert a SIM Card in a Proline Laptop Proline laptops are a popular choice for businesses and students who need a reliable and affordable lapt
 141
141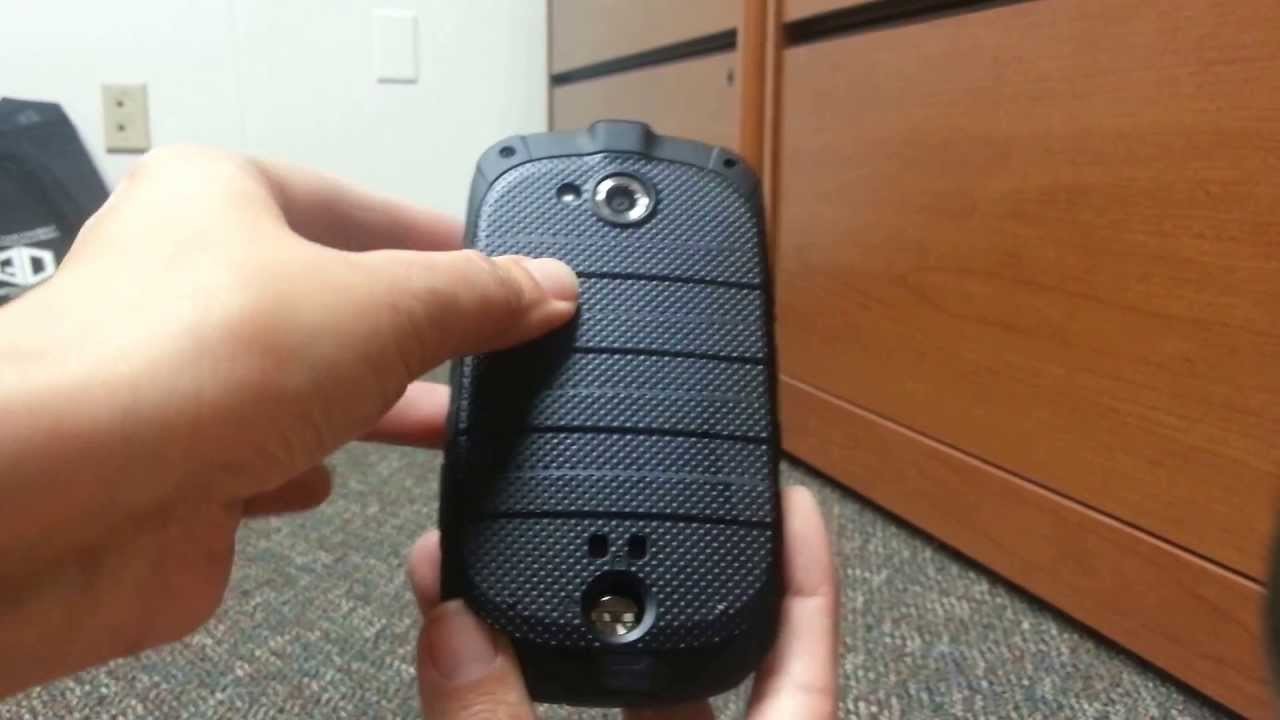
Changing Kyocera Battery At Home Introduction Kyocera phones are known for their durability and long battery life. However, even the best batteries
108
Ford Car Diagnostic Trouble Code (DTC) Retrieval Modern Ford vehicles are equipped with sophisticated onboard diagnostic systems that monitor various
102
Audi A1 Oil Change Guide: Step-by-Step Instructions Changing the oil in your Audi A1 is a crucial part of routine maintenance that ensures your engin
125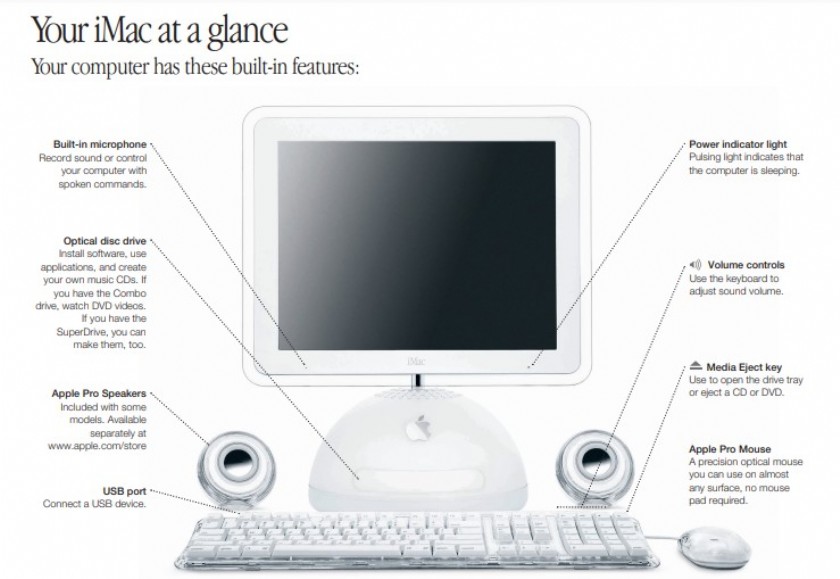
If you don’t find the answer to your problem on the following pages:Look in Mac Help:Look in Mac Help for more information on using your computerIn Ma
361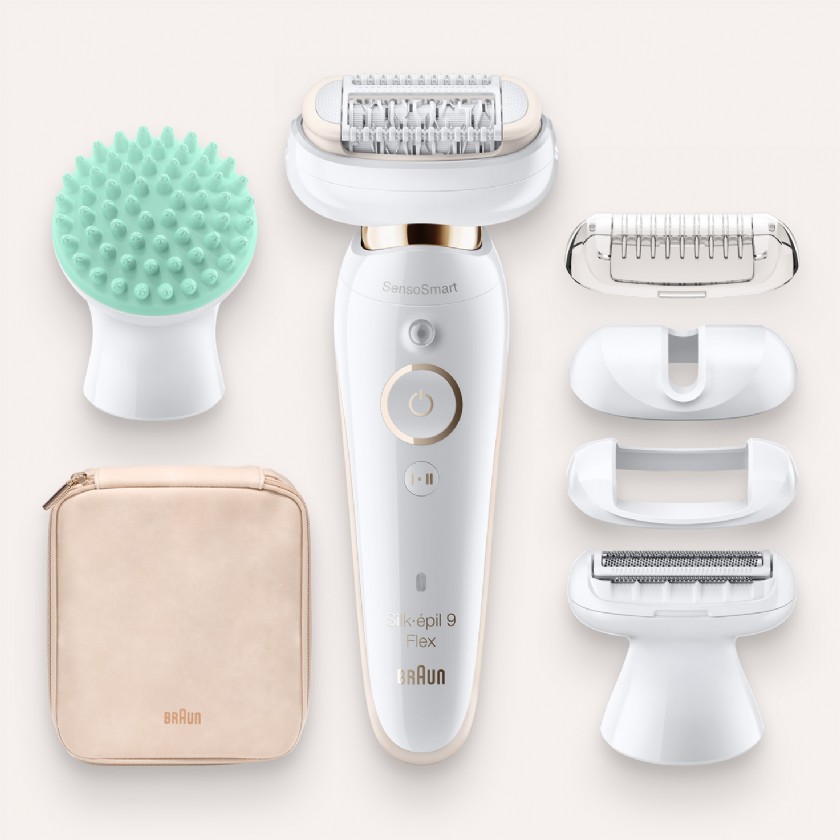
Our products are engineered to meet the highest standards of quality, functionality and design. We hope you thoroughly enjoy using your Braun Silk·épi
475
LG French Door Refrigerator Instructions For UseBefore useClean the refrigerator.Clean your refrigerator thoroughly and wipe off all dust that accumul
74
Lawn Mower Assembly InstructionsUNPACKING• Carefully remove the product and any accessories from the box. Make sure that all items listed in the packi
110Microsoft OLE DB Provider for ODBC Drivers
error '80004005'[MySQL][ODBC 8.0(w) Driver][mysqld-8.0.44]Can't find FULLTEXT index matching the column list
/ara.asp, line 492
